Syncthing 教程
简介
一个在计算机之间同步文件/文件夹的私密安全同步工具,这是它的官网,下面是摘自官网的说明
Syncthing replaces proprietary sync and cloud services with something open, trustworthy and decentralized. Your data is your data alone and you deserve to choose where it is stored, if it is shared with some third party and how it's transmitted over the Internet.
简而言之,就是「我们这个东西跟那些云服务不一样,是非常安全可靠值得信赖的,你的数据由你来作主」
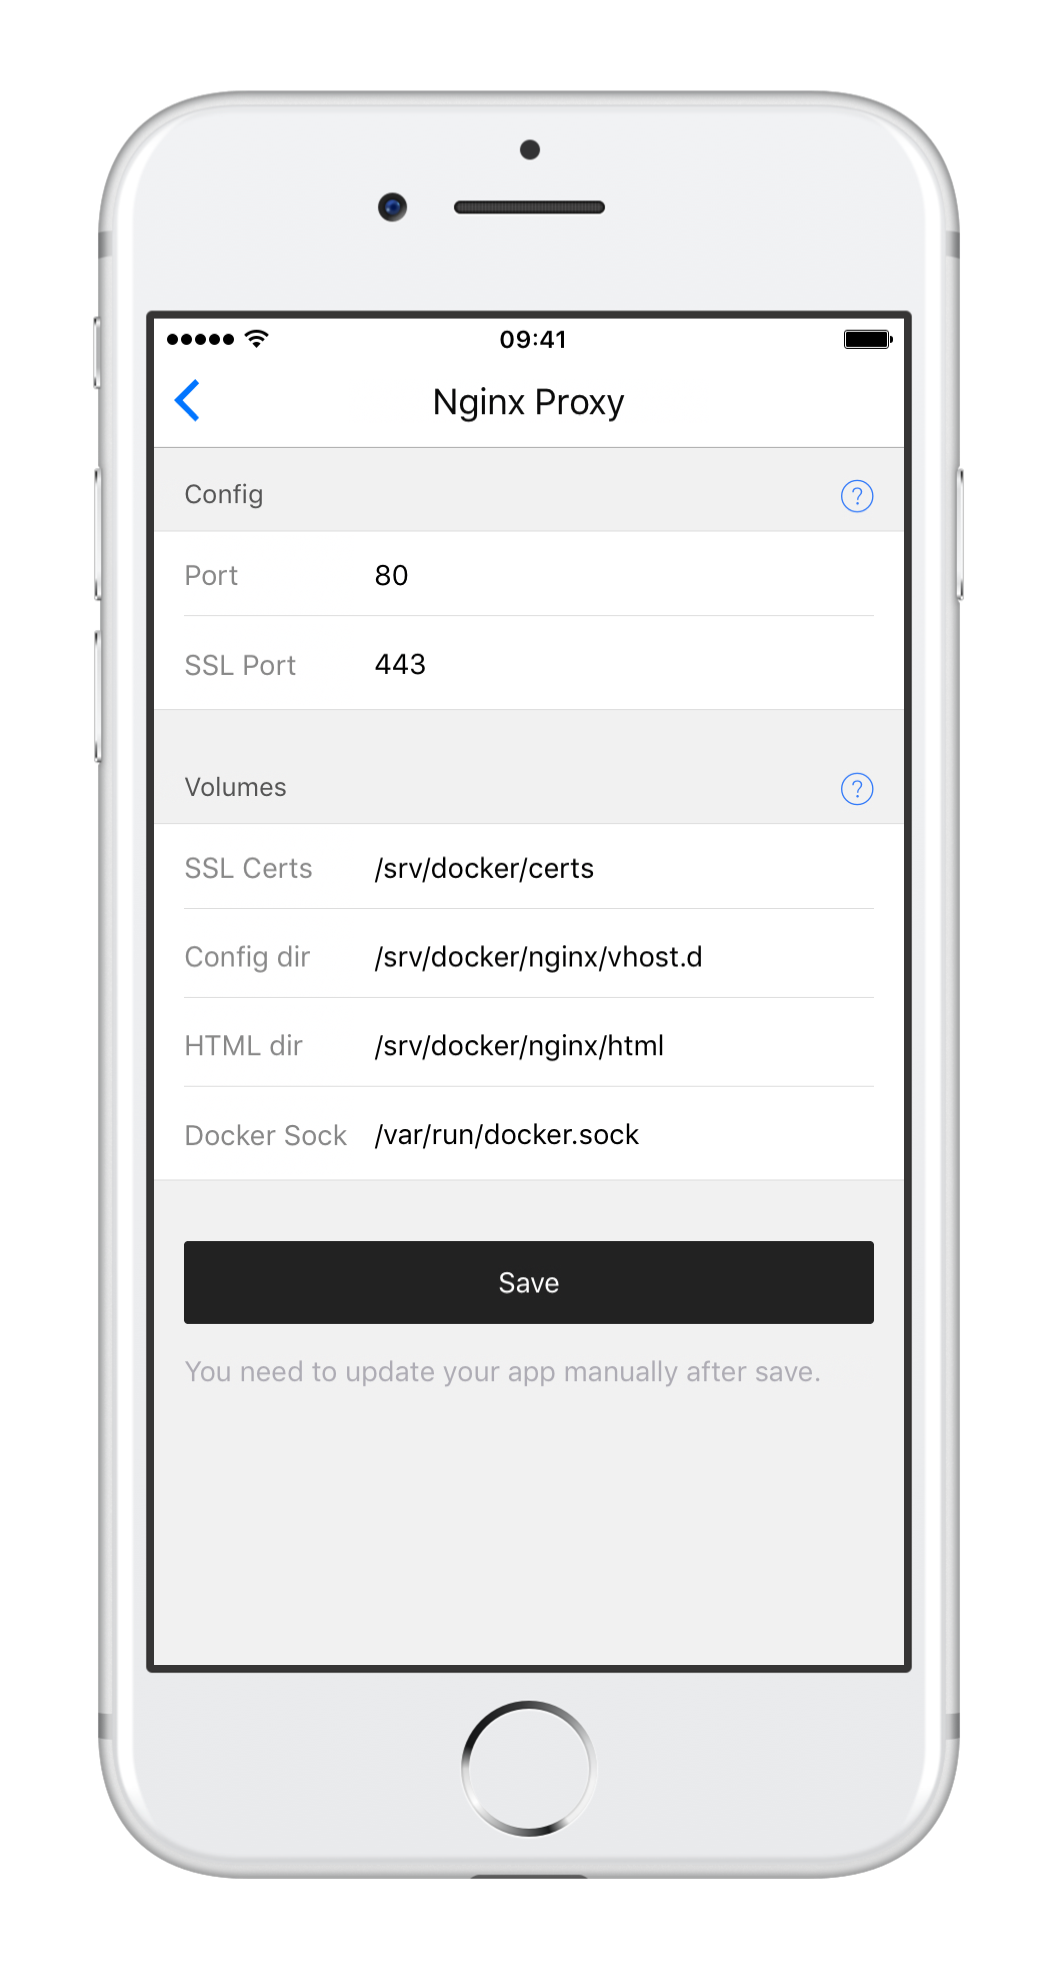
HyperApp 服务端配置
- 在安装
Syncthing前,需要先安装Nginx Proxy和Nginx SSL Support,它们两个个的参数不需要变动。(如果之前已经安装了则可不用安装)
Nginx设置如下:
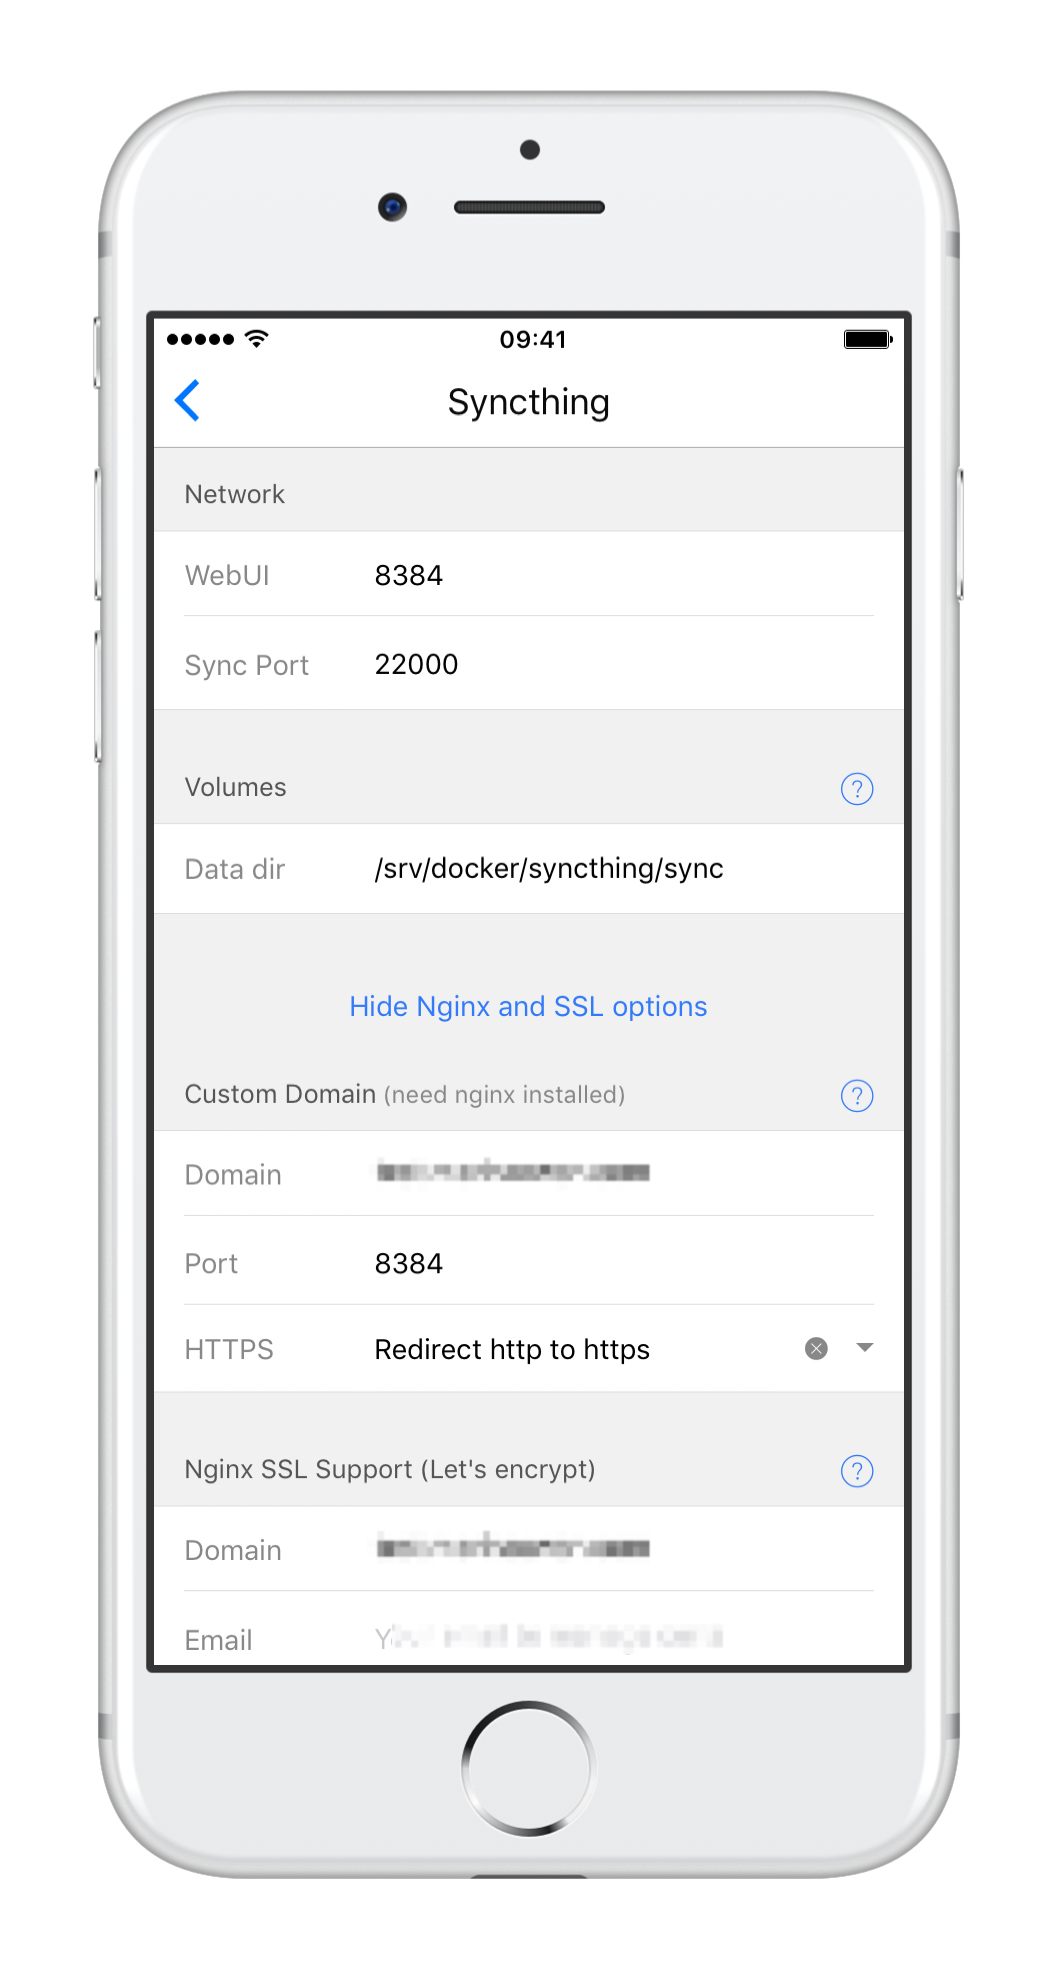
- 首先打开HyperApp在应用中找到Syncthing,填写相关配置:
         "WebUI"                填写`8384`
         "Sync Port"            保持默认
         "Data dir"             保持默认
- 再展开"Show Nginx and SSL options"选项
         "Custom Domain"        填写`你的域名`
         "Port"                 填写`8384`
         "HTTPS"                推荐选择`Redirect http to https`
- 再来到"Nginx SSL Support"选项
         "Domain"               填写你的`域名`
         "Email"                填写你的`邮箱`
全部填写好的示意图如下:
防火墙配置
- CentOS
firewall-cmd --add-port=80/tcp --permanent firewall-cmd --add-port=443/tcp --permanent firewall-cmd --reload - Ubuntu
sudo ufw allow 80
sudo ufw allow 443
解决权限问题
在命令行下键入
chmod -R o+w /srv/docker/syncthing
使用
打开浏览器,键入你的域名,回车即可看到syncthing的页面,进行相关设置后即可使用。
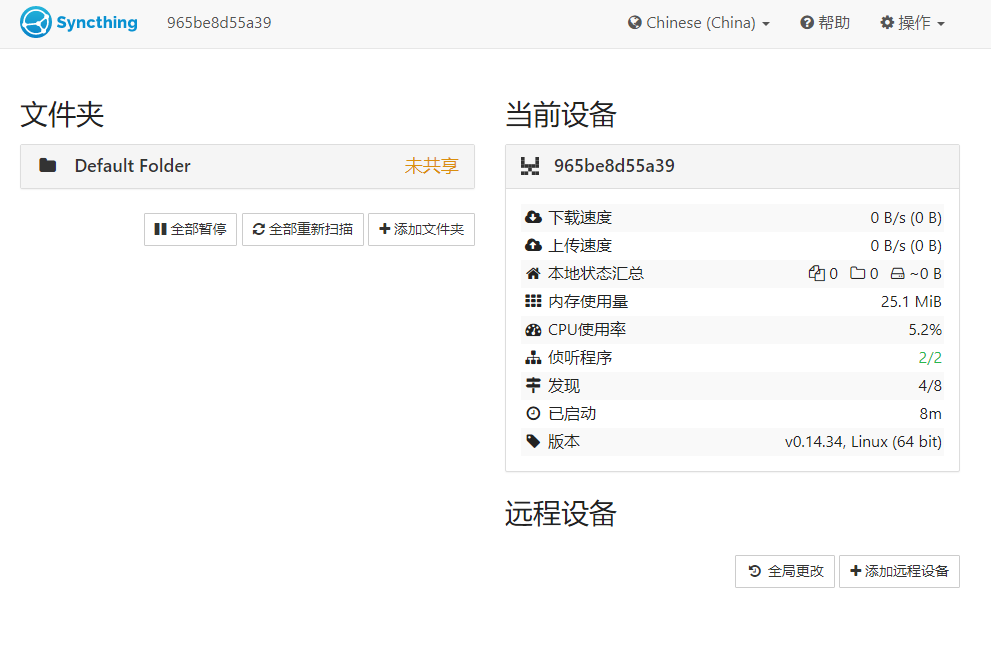
大功告成!
- 注意
长时间打开网页页面可能出现“Syncthing 在处理您的请求时似乎遇到了问题。如果问题持续,请刷新页面,或重启 Syncthing。”的提示,刷新网页即可。